5. First Use
Caution
Never unplug the probe from the device during transmission! This can result in damage to the transmission unit of the us4R™.
Before first use of the us4R™, you must ensure that:
the device has been set up according to Manufacturer guidelines found in section Section 3.3,
proper probe adapter has been installed,
an external host PC and monitor have been connected to the us4R™.
Step-by-step instruction:
Connect the mains to the us4R™ and turn the Power Switch on.
Now, turn on the device by clicking the ON/OFF button.
Connect the ultrasound probe.
Turn on the host PC
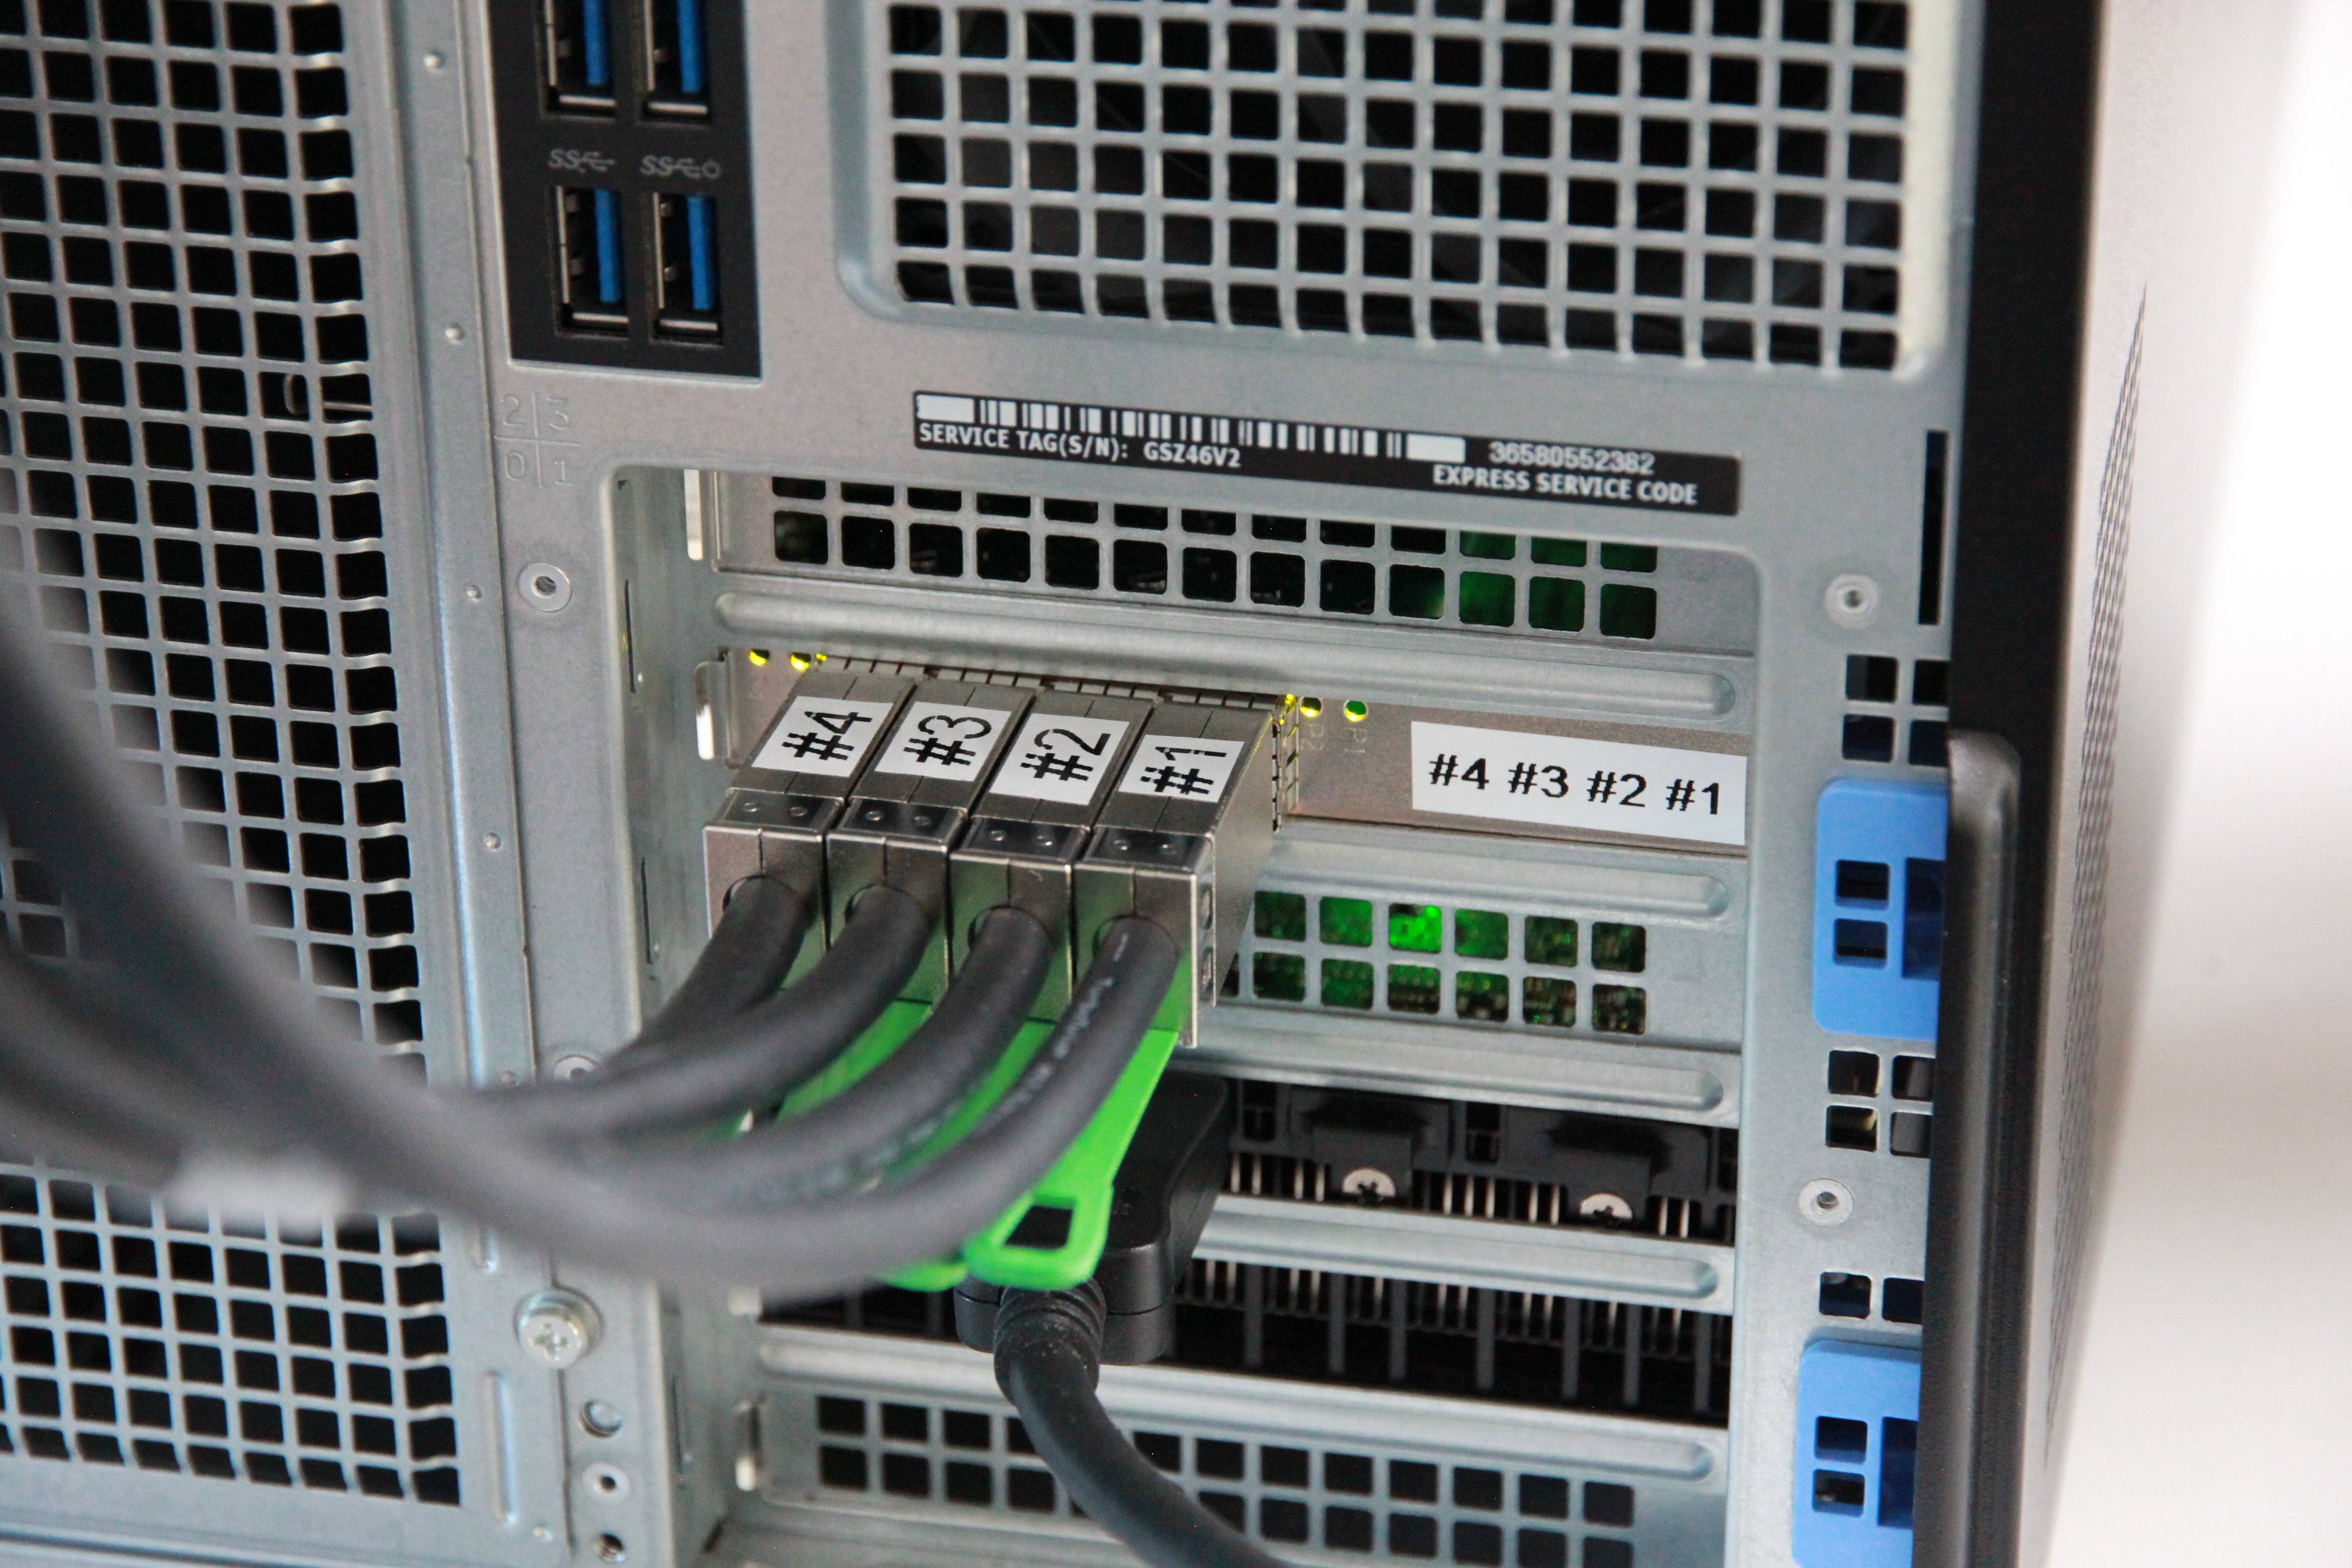
a. Before login check the color of the LEDs on the back of the PC – all 4 or 8 LED indicators (from the top and/or bottom card) should light up GREEN, see Fig. 5.1.

Fig. 5.1 The host PC: the PCIe card interface with four connected PCIe cables and the PCIe links LEDs.
IMPORTANT NOTE: If any of the LED indicators light up ORANGE, please reboot the PC. Keep rebooting until all LEDs are green.
Log in to the host PC (in the case where us4us provides the host PC) using the following login and password:
user: us4uspassword: us4usMake sure to check that the device and its software is starting correctly. If any errors are signaled by the device or messages displayed on screen, proceed according to instructions.
Install the ARRUS package according to instructions available here (if it is not already installed).
Follow the instruction on how to run “plane wave imaging” example script available here. Please remember to use the provided configuration file.
Once the test is over, close the image window.
The host PC can now be turned off by shutting down the Windows system as normal.
Turn off the us4R™ by pressing the ON/OFF button.
After 5 seconds turn off the Power Switch.